Setup
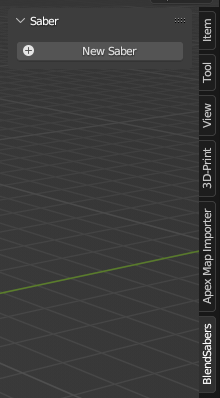
In the 3D View, press N
Click on the BlendSabers tab and click on New Saber
When prompted, type in a name for the saber object; things belonging to the object will use the Name as a base.Saber, the mesh will be named SaberMesh, the material will be named SaberMat, etc.]
Change options in the Panel if desired.
Setup Baking and/or Compositing
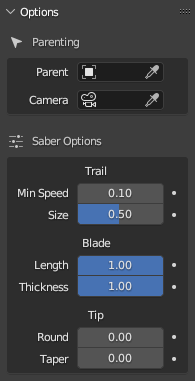
Options
Parenting
Parent: Object to parent the saber to (Use this instead of manually parenting the saber) [Optional]Camera: Camera used to calculate trail in Camera Space [Optional]
Trail
Min Speed: Disable Trail when saber is moving slower than this valueSize: Length/Size of Trail
Blade
Length: Length of the Saber Blade (Switching on/off the saber)Thickness: Thickness of the Saber Blade
Tip
Round: Adjusts the profile of the Saber's tip to be more roundedTaper: Adjusts the profile of the Saber to taper as it reaches the tip
Notes
If trails stop working, press Refresh Sabers
Animate the saber bone named Base or use the provided parenting option if you use Camera Space
Change the color by selecting the mesh and changing the material
When the mesh is selected, there is a button to select the main Saber object

